.
This is what we did with our Sunday.
My oldest daughter is moving out of her old apartment and thought she'd be nice and change out all the blown bulbs, most of which were already blown out when they got there, so I figured now would be a good time to try out something I've been wanting to do for a long time.
The hubs followed the directions (found here) to hollow out the bulbs.
OK, he mostly followed them as our bulbs were a little different.
Only one had the kaolin in it and came clean and clear, so that one got used for the terrarium.
The rest were acid etched and will never come clear, so those got to be the rooting vases. I found the ornament hanger at the dollar store after Christmas for 10 cents (I'd had grand plans of hand painting some Christmas ornaments for next years gifts, but never found any on clearance) But, it worked perfect for this.
I'm really happy with the way these turned out!
And we got to break things, which is very therapeutic.
There are many, many different styles and sizes of glass and plastic objects you can use for terrariums. Use your imagination! Or, just look around the internet - people have used some cool stuff. Salvage stores are sometimes treasure troves. You just have to look around and think outside the box a little. The next time you spy something odd, clear and empty that you think is really cool but don't know what to do with . . .
Happy (tiny terrarium) Growing!
.
Sunday, March 28, 2010
Tiny Terrarium
Friday, February 12, 2010
Be Bold - Add Color
.
A few years ago, I saw a custom built arbor that ran across the entire front of a house on one of 'those' shows.
I was immediately attached to the idea of having one like it.
The hubs wasn't so happy. Well, what did I expect, he'd be the one building it.
I must mention here that the hubs is a genius with his hands.
If I show him something in a book, mag or on tv, and the materials are cheap, he'll engineer it.
Or, at least a reasonable facsimile.
After the groaning about what a pain-in-the derriere this thing was going to be, he started drawing.
It was up in two days!
The problem was - it sat unpainted for two weeks because we couldn't decide on a color.
But, who wants a regular old white arbor? White is nice. Cottagey. Presents the vines and flowers well. Also, boring. Very, very boring.
We hemmed and hawed. Made suggestions to each other. Nahh-ed and maybe-ed each one.
Some we threw out immediately, some we mulled over for the entire two weeks. (dark evergreen green, anyone?)
We figured a trip to the little village hardware store was in order for a few more choices.
My youngest tagged along - I think she was 13 at the time.
She wandered down the paint aisle, pointed to a color chip and said, "That's the color you should paint it."
I was horrified. Florida Bay blue.
Bright, gaudy, in-your-face blue.
The hubs blinked at me and simply said, "Why not?"
I wanted to stamp my foot on the ancient wood floor and scream, "Because it's bright blue! We can't have that color screaming at people from the front of our house. What are you two thinking?"
The only thing I could think of was this house in my old neighborhood that had every strip of siding painted a different pastel color. We called it the 'rainbow house' and thought it was just the craziest, gaudiest thing ever. I didn't want my house being thought of like that!
It might look . . . trashy. (which is the thought I think most people's brains automatically jump to with color)
But, I'm not one to make a scene, you know. Not in public, anyway.
I stared at the chip, trying to envision what it might really look like against the white background of the house. Blue is my favorite color, after all. Maybe it wouldn't be too bad? It's not like it would be on the whole house or something. And we could always paint over it.
So, we painted it that shocking blue.
And we liked it!
Yes, we liked it a lot.
So did the neighbors.
All these years I've never been bold enough to paint my outdoor accessories the colors that I wanted. It was a real eye opener. Why is everyone so afraid of bold colors in the garden? They'll use shocking red, yellow, purple flowers, but everything else must blend into the background. Why? Why can't a pot or other garden accessory compliment other colors? Can you imagine a nice small splash of purple hidden among some hostas? Or a bit of sunny yellow nestled among some purple amaranth? A garden chair painted a soothing mint green situated in the shade garden inviting visitors to have a seat, relax and enjoy the scenery?
What's better than a beautiful splash of color, that isn't a flower, somewhere in the garden?
Start small, maybe a pot. (somewhere I saw a set of small buckets that someone had added feet to, painted pastel colors and used for flower pots. They were gorgeous!!)
Even a few small rocks placed here and there.
Be bold. Grab that paintbrush and try it. See how you feel about it.
Besides, you can always repaint.
:)
I'm now mulling over painting our pond bench lavender. Adding a little color was one of the best decisions we ever made, so why not?
Happy (adding that splash of color) Growing!
.
Wednesday, December 09, 2009
2009 Pressed Flower Christmas Cards

This years cards turned out absolutely gorgeous!
I didn't include seeds this year because I don't think anyone is planting them and with D losing his job money is squeaky tight for seed purchases. I'll be down to having only what I've saved in flower seed and not buying much for veg :( But, I think they look pretty awesome with the other additives in the paper.
Now, if I could just remember to start pressing the flowers in the spring . . .

Wednesday, December 10, 2008
Handmade Seed Paper Cards
.
Pictures removed because they're being stolen by Polyvore!
I got such wonderful responses to last years Seed Paper - Pressed Flower - Rubber Stamped - Christmas Cards , I thought I'd go ahead and do them again this year.
Thursday, November 29, 2007
Seed Paper - Pressed Flower - Rubber Stamped - Christmas Cards
Pictures removed because they are being stolen and used by Polyvore!!
Yup, that's exactly what they are!
Dried seed paper
Inside card
I ended up gluing a 4-leaf clover inside each card, too. I had to do something with that mountain! Maybe they'll bring everyone else some Christmas luck. :)
Below are a few examples of the finished cards. I did 20. Maybe I should do a few more...just in case.
And here are the cute little hedgehog envelopes they'll make the mail trip in. I hope the delicate flowers survive! The postal system can be brutal.
I am so darn glad I gave this a try this year. I hope the recipients enjoy getting something other than the normal Christmas card! If I'm lucky, They'll actually plant them and enjoy the flowers, but I'm not holding my breath. lol.
Hmmm, I had so much fun doing these, maybe I'll make this a yearly tradition! Ooooo, must grow new, interesting flowers to press! Wow, could I enable myself a little more?
(EDIT: They looked much neater - flatter, smoother - after I pressed them and cleaned up the edges! I wonder how those patterned edging scissors would make them look. hmmm...)
Monday, February 12, 2007
PVC Ecstacy
OMG! I love my husband!
D made me this plant stand for my Valentines gift! I couldn't even wipe the smile off my face while giving him the finger-wag for spending money we don't have, which kind of defeated the the whole purpose of the scolding.
I'm ecstatic! To me, this gift is the equivelant to other women receiving 5 carat diamonds. Who needs diamonds when you can grow plants instead?
Is there such a thing as being too obsessed with gardening? Maybe I need a twelve step program. If I ever win the lottery - look out!
Tuesday, January 30, 2007
What's Their Hurry?
My azalaes germinated already!
I'm a little shocked at how fast they've decided they needed to start.
Anyway, it was only 8 days ago that I sprinkled those tiny seeds from The Willow Garden onto carefully prepared peat/coffee ground soil. Maybe they're happy with the soil, maybe the containers.
Years ago, My Aunt, aka The Plant Lady, showed me how to make these self-watering pots out of juice and soda bottles for rooting cuttings. Or, any kind of container you could cut through that would work. (Hacksaws are a grand thing to have hanging around!) She showed me this because, dummy me couldn't figure out the "moist, but not too wet - moist, but not too dry" formula for making cuttings happy.
It's very simple: You cut something in half, like a 2 liter soda bottle (which is perfect), flip the top upside down into the bottom (making sure the cap part-that's now inside- hits the bottom), fill upside down one with soil, make sure the bottom (under the upside down part) never runs out of water, and voila! You can either pull the top edge of the bottom piece out and squish the upside down side in to add water (whew! Did anyone understand that?) or just cut a hole a few inches up on the bottom piece and water through that. The whole setup works perfectly for keeping soil moist, but not too wet, as it wicks up from the bottom (where the screw-cap was).
Making a fill hole sure sounds like the easier way, which is why that's exactly what I do. lol. But to each his own.
Well, it hit me that it would be the perfect environment for starting rhododendrons and azaleas! Duh! Just add a clear storage bag over the top with a rubber band around the bottom of the bag, and perfectly moist soil with 100% humidity!
Well, the seeds obviously like it.
Tinker with the idea. I bet you'll like it and get some spectacular results. I do!
Monday, January 29, 2007
Onwards & Outwards
I got around to getting some more WS containers out, so my total is now at 36.
The poor milk jugs are under 6 inches of snow.
Not cool that I look out and can't even see them, but I know they're under there waiting patiently for spring.
D is going to build me a nice plant stand this year with these Plant Stand Instructions.
Of course, he's going to overdrive the lights for it. I think it's a 'more power' man thing. But, I'm not complaining - the more light the better!
Now I just have to save up enough pennies to get it done before March so I can get my inside stuff started on time. Kim sent me some really yummy sounding veg seeds that I'm dying to try. I suppose I could WS them and be done with it, but I want to see something growing. That's the only problem with WSing - it's pretty much fuss-free and hands off. Not good for wanting to get my hands dirty and baby some seedlings!
Thursday, November 16, 2006
Blast From The Past
I've been stuck on watching two shows lately; Take Home Chef and If Walls Could Talk. Can you imagine Take Home Gardener? Ha ha! Accosting an unsuspecting customer at a garden center, buying plants and then rushing home to their yard to redo it. I think the host should be able to ask only one question: "How much yard ya got?"
As for 'If Walls Could Talk', well, I like that one just because I have something really cool in common with it-the surprising things you find hiding inside really old houses. We found some! Really cool old things, that is.
The house we bought is over 200 years old and used to be an apple orchard way back when. We found a piece of old newspaper in the wall of a new addition. New as in an addition bedroom built onto the existing house in 1818!! The paper was really cool, and you just had to laugh when reading it; 'So-and-so visited so-and-so for tea at 2:00 in the afternoon on Sunday, June 8th.' My, my, my-gossip in the local paper. It also mentioned that ladies should stay away from a certain area of town since there would be prisoners working on the railroad on such-and-such days. And an 1818 advertisement for pantaloons! I would have assumed that to be a bit risque back then, what with having a picture and all. How very scandalous!
Anyway, since the scanner has decided to cooperate lately, I thought I'd save some of the other interesting things we've found in the walls through 20 years of DIY remodeling. (Don't try it yourself folks, not fun!)
Grocery bill for Henry Kitchen (previous owner of house and apple orchard) from 1891. Wow, notice how Pillsbury was on the advertising bandwagon even way back then?
The top of a box of harness snaps from Oneida Community Limited in Niagara Falls. (I have a sneaking suspicion that the 'Oneida Community' started in Niagara Falls and then moved to Oneida to make silverware, not directly from Vermont, though none of their history documents this)
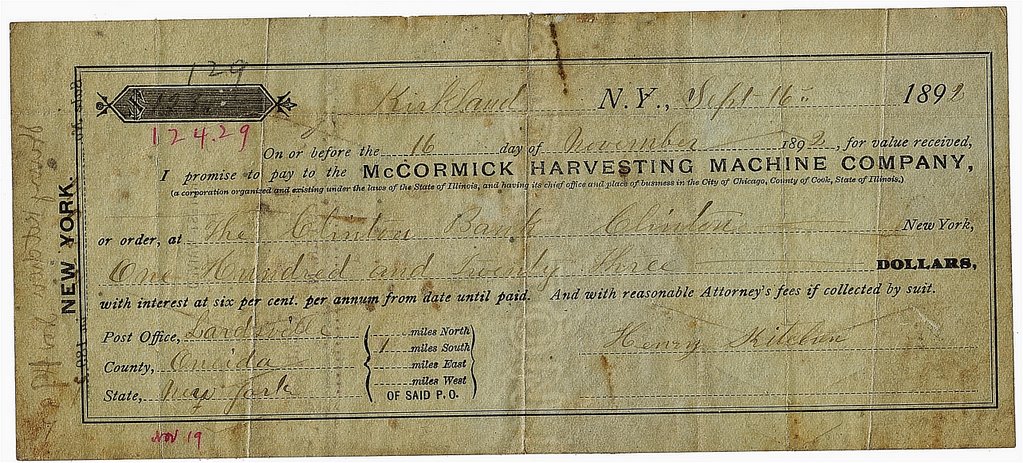
In 1892 Henry hired a Harvesting company from Chicago for $123.00 (adjusted a few times to $124.29 on November 19th, then to $129.00 (no date noted). Interest sucked even back then! Wow, for 1892, that was a lot of money!)
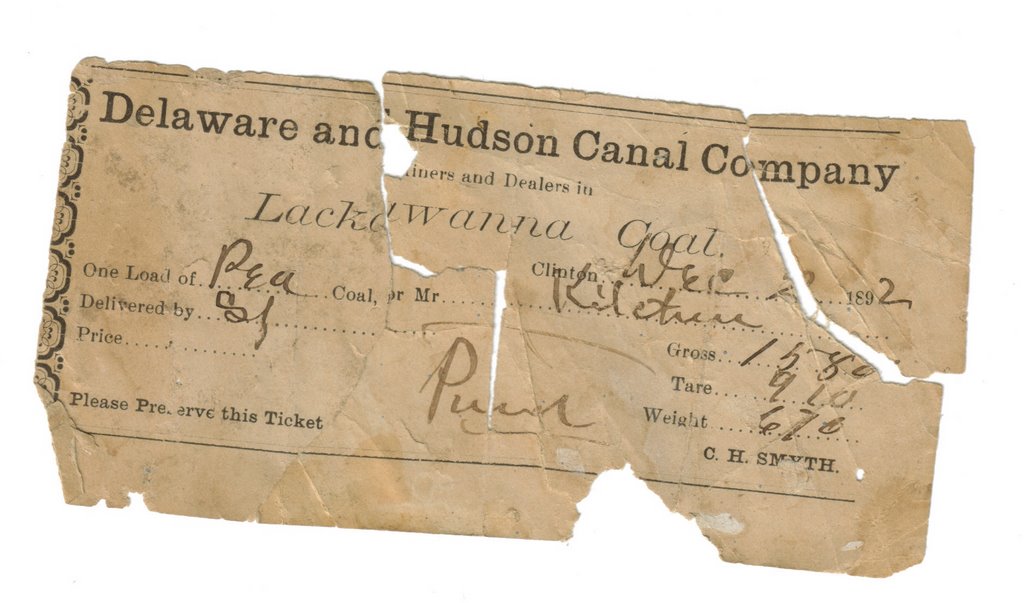
In 1892, coal meant heat for the winter. I wish we had the price. The original furnace that burned this coal is still in our cellar!
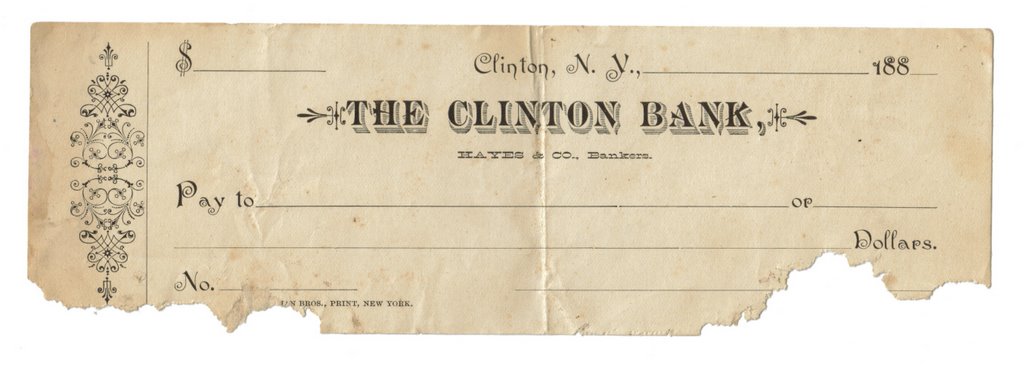
Finally, this is what checks used to look like in the 1800's. Cool or what?! The bank is still there, well, sorta. I need to research it some more.
There was another store receipt found in a wall, but it was so fragile that even with us being as careful as humanly possible, it pretty much turned into confetti. But, it was either leave it there to be destroyed or take a chance, so we chose the latter.
Now that I've documented them, it's back to the fireproof box for our 'wall treasures.'
Ain't history cool?! I have a customer bill for apples too, so I'll have to check into the orchard a bit more. A few trees still exist on the neighbors property. Think I should snatch some seeds?